Envelope Encryption with AWS KMS in Node.js, Part Two: Generating DEKs with AWS KMS
Karol Moroz on
This is the second installment of a series of articles discussing a cryptographic technique called envelope encryption. A more detailed description of this technique is provided in part one of this series.
In this article I’m going to introduce the AWS KMS API. In order to proceed with this part of the tutorial, you’re going to need an active AWS account.
We will continue working on the project we created in part one. You can find the source code on my GitHub at moroz/envelope-encryption-node, branch tutorial/part-1. The code is MIT-licensed.
In this series, I use mise-en-place to install and manage tool versions, so make sure you have it installed and configured if you intend to follow along:
$ mise version --json
{
  "version": "2026.6.11 macos-arm64 (2026-06-16)",
  "latest": "2026.6.11",
  "os": "macos",
  "arch": "arm64",
  "build_time": "2026-06-16 23:02:34 +00:00"
}
Clone the project
If you haven’t followed along the first part, clone the project onto your local machine:
$ git clone https://github.com/moroz/envelope-encryption-node -b tutorial/part-1Change to the project directory. Install AWS CLI and aws-vault using Mise:
$ cd envelope-encryption-node
$ mise trust
$ mise install
$ mise use aws@2.35.6 aws-vault@7.12.2
mise 2026.5.18 by @jdx
aws-vault@7.12.2
aws@2.35.6
mise ~/working/exp/envelope-encryption-node/mise.toml tools: aws@2.35.6, aws-vault@7.12.2
Set up AWS CLI
In order to call the AWS API, we need to first obtain some API credentials. The easiest way to set it up in development is using static access keys.
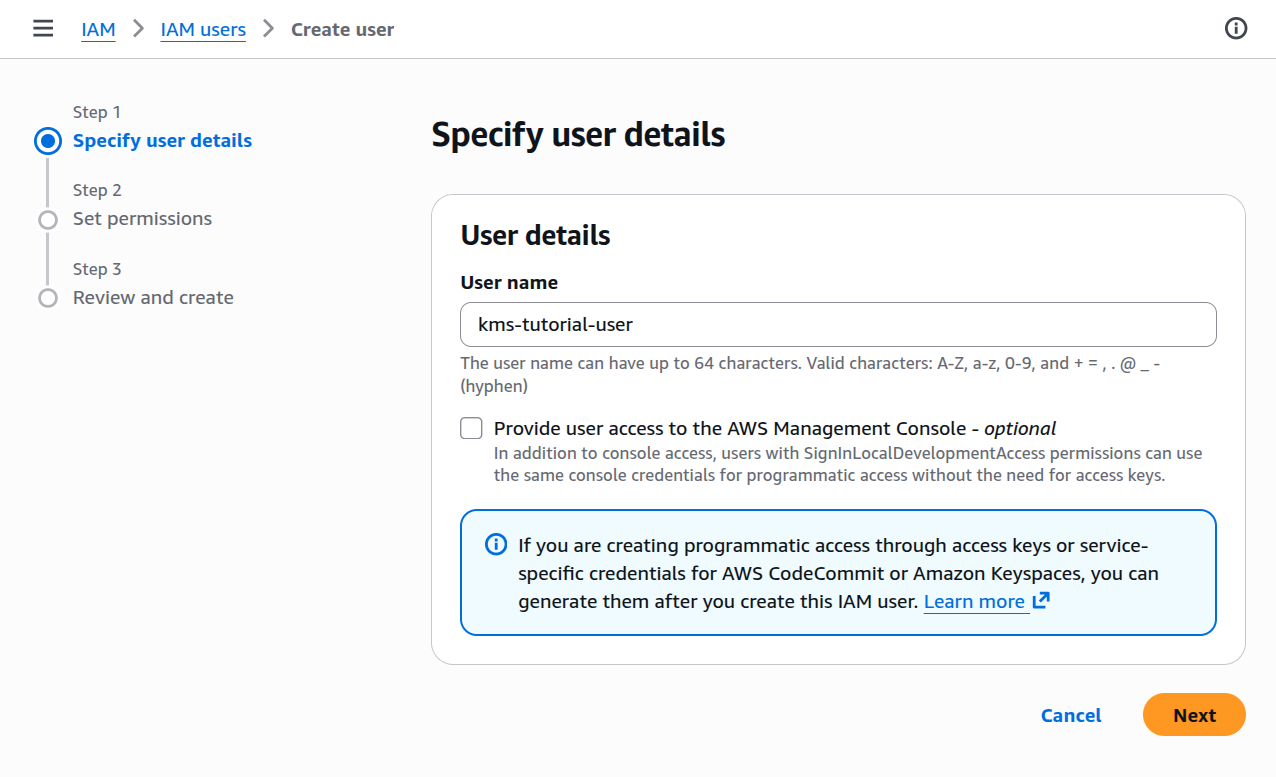
Sign in to the AWS Web console. In the IAM dashboard, go to IAM users, then click Create user.
Under User details, in User name, type kms-tutorial-user.
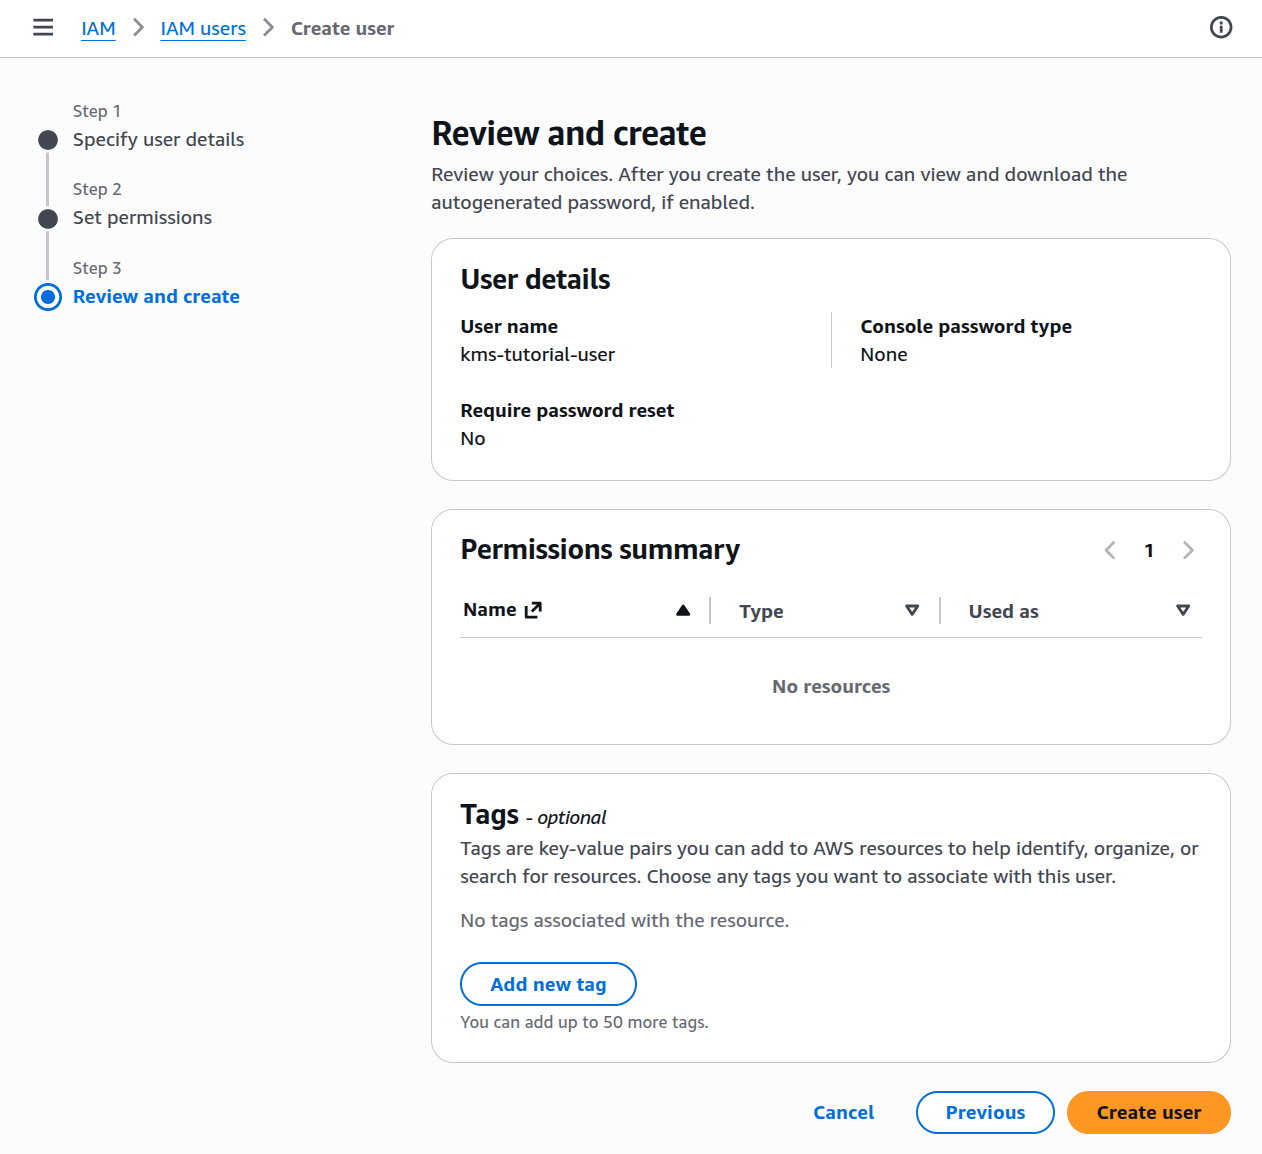
Skip the permissions step for now. In the Review and create view, you should get the following settings:
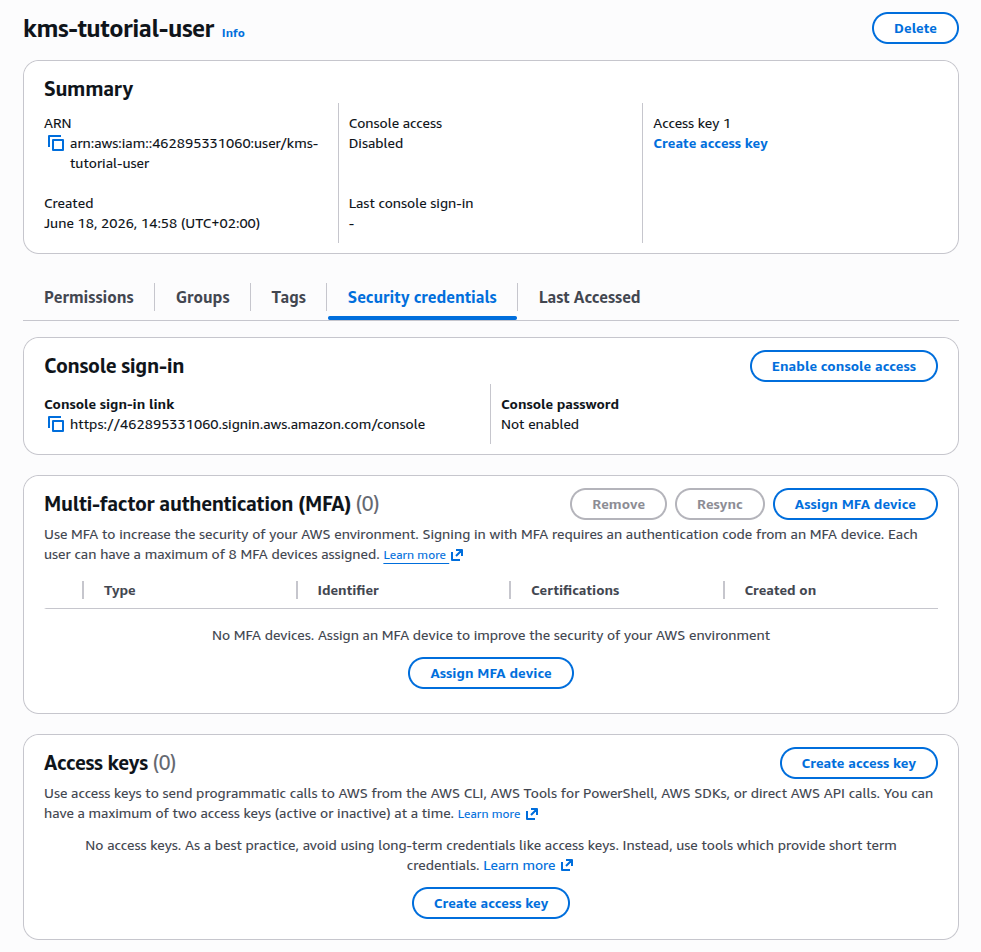
After you have created the user, go to the detailed view for this user:
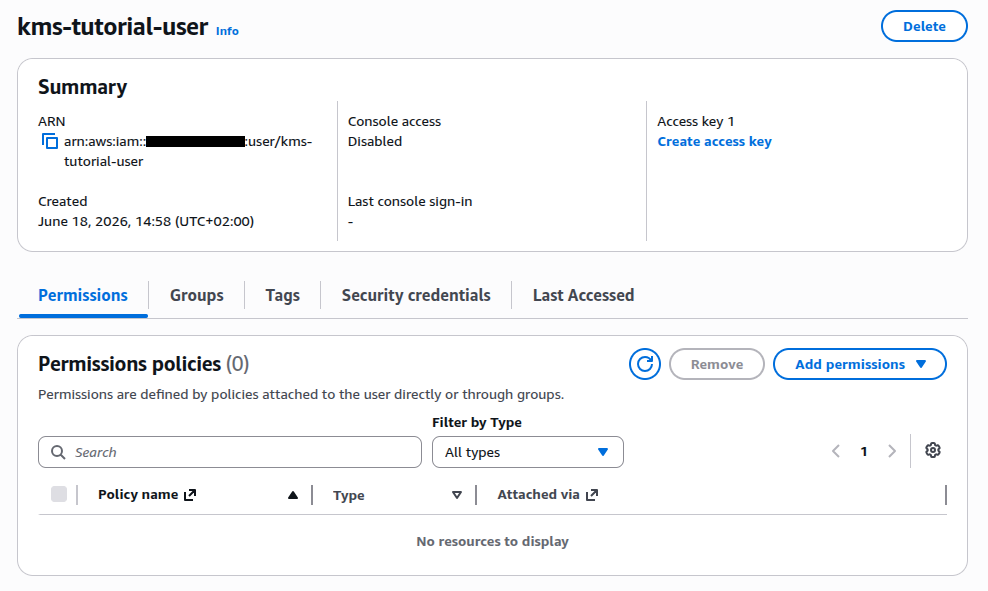
Click Add permissions > Create inline policy. In the Specify permissions view, switch to the JSON editor and paste the following policy document:
{
"Version": "2012-10-17",
"Statement": [
{
"Effect": "Allow",
"Action": [
"kms:CreateKey",
"kms:Get*",
"kms:List*",
"kms:GenerateDataKey",
"kms:Encrypt",
"kms:Decrypt"
],
"Resource": "*"
}
]
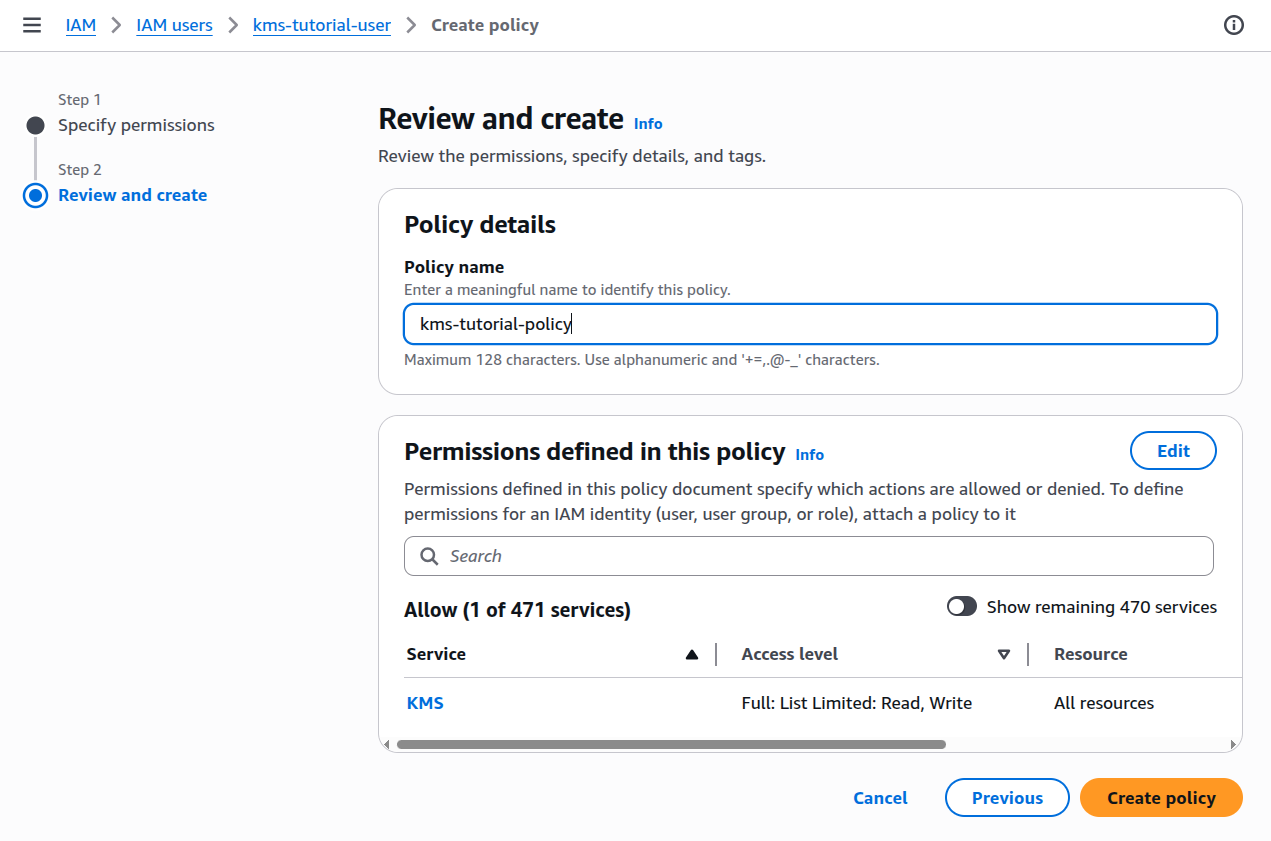
}In the next step, name the policy kms-tutorial-policy and click Create policy:
Next, go to the user’s Security credentials tab and click Create access key:
Under Use case, choose Command Line Interface (CLI). Tick the checkbox labeled I understand the above recommendation and want to proceed to create an access key. Click Next, then Create access key. You should now see a view named Retrieve access keys:
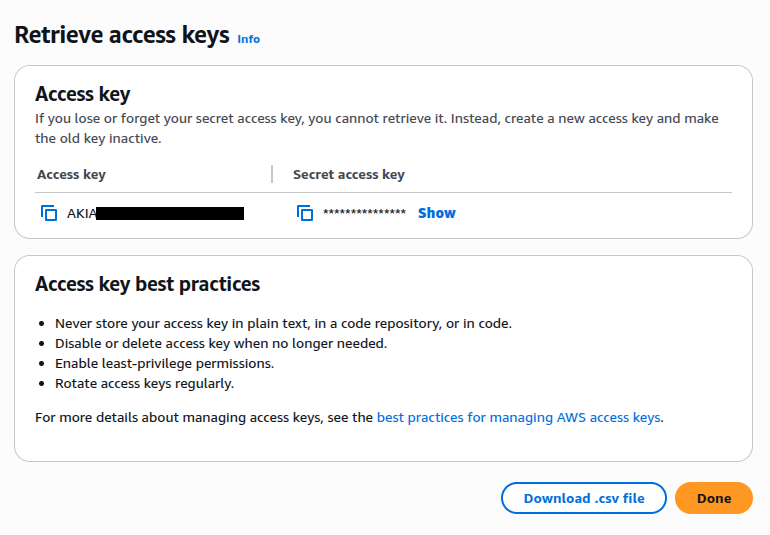
Next, let’s set an AWS CLI profile. Add a new configuration section in ~/.aws/config.
You may want to swap eu-central-1 (Frankfurt) for another AWS region. Pick the one which is closest to you.
[profile kms-tutorial]
credential_process=aws-vault exec kms-tutorial --json --prompt=terminal
region=eu-central-1
Paste the access key ID and secret access key from your browser to aws-vault:
$ aws-vault add kms-tutorial
Enter Access Key ID: AKIAIOSFODNN7EXAMPLE
Enter Secret Access Key: *****************************************
Enter MFA Device ARN (If MFA is not enabled, leave this blank): [Enter]
Added credentials to profile "kms-tutorial" in vault
Verify the configuration using aws sts get-caller-identity. If you have configured the credential flow correctly, the command should return a JSON response similar to the one below:
$ aws sts get-caller-identity --profile=kms-tutorial
{
    "UserId": "AIDASAMPLEUSERID",
    "Account": "123456789012",
    "Arn": "arn:aws:iam::123456789012:user/kms-tutorial-user"
}
Create a KMS key
Next, we’re going to create a KMS key. This resource is going to act as our Key Encryption Key (KEK) going forward. Please note that KMS keys are paid resources. As of this writing, one KMS key costs US$1/month. You should delete this key as soon as you have finished experimenting.
$ aws kms create-key --profile=kms-tutorial
{
    "KeyMetadata": {
        "AWSAccountId": "123456789012",
        "KeyId": "63dd51d2-4b2d-44d1-9e96-e69c88af10fd",
        "Arn": "arn:aws:kms:eu-central-1:123456789012:key/63dd51d2-4b2d-44d1-9e96-e69c88af10fd",
        "CreationDate": "2026-06-17T15:22:47.786000+02:00",
        "Enabled": true,
        "Description": "",
        "KeyUsage": "ENCRYPT_DECRYPT",
        "KeyState": "Enabled",
        "Origin": "AWS_KMS",
        "KeyManager": "CUSTOMER",
        "CustomerMasterKeySpec": "SYMMETRIC_DEFAULT",
        "KeySpec": "SYMMETRIC_DEFAULT",
        "EncryptionAlgorithms": [
            "SYMMETRIC_DEFAULT"
        ],
        "MultiRegion": false,
        "CurrentKeyMaterialId": "db152ed46fa52367eb584bdb00cd2cd89f3bd680bb18db90eaede38a3153e0e2"
    }
}
Inject environment variables using Mise
Write down the KeyId or Arn—you will need to specify the resource identifier in all API calls.
A good way to inject the ID into your application is using environment variables.
In the project root, create a file called mise.local.toml:
[env]
AWS_PROFILE = "kms-tutorial"

# .KeyMetadata.KeyId or .KeyMetadata.Arn, as returned by CreateKey
ENCRYPTION_KEY_ID = "..."
With this configuration file, your shell should now have access to both variables:
$ echo $ENCRYPTION_KEY_ID $AWS_PROFILE
63dd51d2-4b2d-44d1-9e96-e69c88af10fd kms-tutorial
You should treat mise.local.toml just like any other environment (dotenv) file—assume it may contain sensitive values and should not be committed to version control.
Create a .gitignore:
# NPM packages
node_modules/

# TypeScript artifacts
dist/

mise.local.toml
Verify that mise.local.toml is ignored:
$ git check-ignore -v mise.local.toml
.gitignore:7:mise.local.toml    mise.local.toml
Create an example configuration file
It’s good practice to provide an example configuration file if your project relies on an ignored file. In the project root, create a file called mise.local.toml.example:
[env]
AWS_PROFILE = "kms-tutorial"

# .KeyMetadata.KeyId or .KeyMetadata.Arn, as returned by CreateKey
ENCRYPTION_KEY_ID = ""
Now is probably a good moment to commit the changes:
$ git add .

$ git status -s
M  .gitignore
M  mise.toml
M  package.json
A  mise.local.toml.example

$ git commit -m "Set up AWS CLI"
[tutorial/part-1 25aec7a] Set up AWS CLI
 3 files changed, 9 insertions(+), 1 deletion(-)
Install and configure AWS SDK for JavaScript
In order to call AWS APIs in Node.js, we need to install the AWS SDK for JavaScript. Install the package @aws-sdk/client-kms using pnpm:
$ pnpm add @aws-sdk/client-kmsCreate a new file named src/kms.ts. Import and instantiate a KMS client:
import { KMSClient } from "@aws-sdk/client-kms";

const kmsClient = new KMSClient();
With the AWS CLI and the AWS_PROFILE environment variable correctly set up, the SDK should pick up the correct credentials implicitly.
Read the Key Encryption Key ID from environment variables
Before we make any calls to the KMS API, we need to know the key identifier in our code. Using process.env, we can inject the key ID from environment variables.
For that, I like to use a helper function called mustGetenv:
function mustGetenv(name: string): string {
  const value = process.env[name];
  if (!value) {
    console.error(`FATAL: Environment variable ${name} is not set!`);
    process.exit(1);
  }
  return value;
}

const ENCRYPTION_KEY_ID = mustGetenv("ENCRYPTION_KEY_ID");
Install TypeScript compiler
At this point, Node.js can still execute the code just fine without transpilation, but the TypeScript LSP complains about the process global. It’s time to add the TypeScript compiler as a development dependency:
$ pnpm add -D typescript @types/nodeCreate a tsconfig.json file in the project root:
{
  "compilerOptions": {
    // File Layout
    "rootDir": "./src",
    "outDir": "./dist",

    "module": "nodenext",
    "target": "esnext",
    "lib": ["esnext"],
    "types": ["node"],

    // Stricter Typechecking Options
    "noUncheckedIndexedAccess": true,
    "exactOptionalPropertyTypes": true,

    "allowImportingTsExtensions": true,
    "rewriteRelativeImportExtensions": true,

    // Recommended Options
    "strict": true,
    "verbatimModuleSyntax": true,
    "isolatedModules": true,
    "noUncheckedSideEffectImports": true,
    "moduleDetection": "force",
    "skipLibCheck": true
  }
}
Verify that the TypeScript compiler is happy:
$ pnpm exec tsc --noEmit && echo "OK"
OK
Now is probably a good time to commit:
$ git add .

$ git status -s
M  package.json
M  pnpm-lock.yaml
A  src/kms.ts
A  tsconfig.json

$ git commit -m "Install TypeScript and AWS SDK"
[tutorial/part-2 ec7ad92] Install TypeScript and AWS SDK
 4 files changed, 728 insertions(+), 1 deletion(-)
 create mode 100644 src/kms.ts
 create mode 100644 tsconfig.json
Generate a Data Encryption Key
In this section, we are going to generate a Data Encryption Key (DEK) using the GenerateDataKey API.
The command has two required parameters: KeyId, which is the identifier of the Key Encryption Key; and either KeySpec or NumberOfBytes.
Let’s make the call in src/kms.ts:
import { GenerateDataKeyCommand, KMSClient } from "@aws-sdk/client-kms";

function mustGetenv(name: string): string {
  const value = process.env[name];
  if (!value) {
    console.error(`FATAL: Environment variable ${name} is not set!`);
    process.exit(1);
  }
  return value as string;
}

const ENCRYPTION_KEY_ID = mustGetenv("ENCRYPTION_KEY_ID");

const kmsClient = new KMSClient();

const generateDataKeyResponse = await kmsClient.send(
  new GenerateDataKeyCommand({
    KeyId: ENCRYPTION_KEY_ID,
    KeySpec: "AES_256",
  }),
);
console.log({ generateDataKeyResponse });
If everything goes well, the script should now print out an API response:
$ node src/kms.ts
{
  generateDataKeyResponse: {
    CiphertextBlob: Uint8Array(184) [
        1,   2,   3,   0, 120, 169, 223,  29, 243,  11, 222, 236,
      161, 143,  53,  35, 247,  55, 184,  58,  78, 208,  83, 112,
       19, 248,  32, 146, 223,  90, 222,  82, 192, 186, 195,   9,
      154,   1, 189,  52, 200, 247, 149, 134,  63,  98, 117,  92,
      118, 165,  48,  33, 137,  63,   0,   0,   0, 126,  48, 124,
        6,   9,  42, 134,  72, 134, 247,  13,   1,   7,   6, 160,
      111,  48, 109,   2,   1,   0,  48, 104,   6,   9,  42, 134,
       72, 134, 247,  13,   1,   7,   1,  48,  30,   6,   9,  96,
      134,  72,   1, 101,
      ... 84 more items
    ],
    Plaintext: Uint8Array(32) [
      162, 198, 176,  98, 107,  89, 150, 246,
       15, 215, 110, 175, 115, 196, 112, 156,
      144,  71, 203,  98,  97, 101,  93, 217,
      165,  43,  28,   9, 126,  73,  62,  43
    ],
    KeyId: 'arn:aws:kms:eu-central-1:123456789012:key/63dd51d2-4b2d-44d1-9e96-e69c88af10fd',
    KeyMaterialId: 'db152ed46fa52367eb584bdb00cd2cd89f3bd680bb18db90eaede38a3153e0e2',
    '$metadata': {
      httpStatusCode: 200,
      requestId: 'b255061e-7cd8-459e-86f7-128392c3dd41',
      extendedRequestId: undefined,
      cfId: undefined,
      attempts: 1,
      totalRetryDelay: 0
    }
  }
}
The response contains two fields that are of interest to us: Plaintext, which is a 256-bit Data Encryption Key; and CiphertextBlob, which encodes the same key in an encrypted format. We can use the Plaintext key to encrypt data, then store the CiphertextBlob alongside the encrypted file.
Learnings
- You can call the AWS APIs in Node.js using the AWS SDK for JavaScript.
- On your development machine, the easiest way to set up AWS credentials is using static access keys.
- You can use the AWS CLI in tandem with
aws-vaultto gain access to the AWS APIs on your development machine. - Modern Node.js can run basic TypeScript without transpilation, but the TypeScript LSP will yell at you if you access Node-specific globals such as
process. - Use the
kms:GenerateDataKeyAPI to generate a Data Encryption Key.
In the next part of this series, we will write a CLI program to encrypt and decrypt files.