How to set up and deploy an Astro website to Github Pages
Karol Moroz on
Make sure you have mise installed:
$ mise version
2025.6.0 macos-arm64 (2025-06-02)
If your version of mise is older, update it:
$ mise self-update -yUsing mise, install latest Node.js (24.1.0 as of this writing), pnpm (10.11.1 as of this writing), and prettier (3.5.3 as of this writing):
mise use -g node@24.1.0 npm:pnpm@10.11.1 npm:prettier@3.5.3In the directory where you keep your projects (e. g. ~/projects), create an Astro project using pnpm create:
# Replace this with the name of your project
$ project_name=megane

# Create an Astro project called `$project_name` using the minimal template.
# Create a Git repository for the project and install dependencies.
$ pnpm create astro@latest $project_name --template minimal --git --install

# Change the working directory to the project's directory
$ cd $project_name
Set versions for Node, pnpm and Prettier for the current project:
mise use node@24.1.0 npm:pnpm@10.11.1 npm:prettier@3.5.3Install and set up Prettier
Install Prettier and its plugins using pnpm. This will install plugin for Svelte and Tailwind.
$ pnpm add -D prettier prettier-plugin-{astro,svelte,tailwindcss}In the project’s root directory, create a file called .prettierrc.cjs:
module.exports = {
  plugins: [
    require.resolve("prettier-plugin-astro"),
    require.resolve("prettier-plugin-svelte"),
    require.resolve("prettier-plugin-tailwindcss"),
  ],
  overrides: [
    {
      files: "*.astro",
      options: {
        parser: "astro",
      },
    },
    {
      files: "*.svelte",
      options: {
        parser: "svelte",
      },
    },
  ],
};
With this set up, you should be able to format source code in the project using prettier:
$ prettier -w .
.vscode/extensions.json 16ms (unchanged)
.vscode/launch.json 1ms (unchanged)
astro.config.mjs 3ms
package.json 0ms
pnpm-lock.yaml 113ms
README.md 15ms
tsconfig.json 1ms (unchanged)
Create a Github repository
Create a Github repository for the project. You can do it in the browser, or using gh.
Push the project to this new repository.
The rest of this walkthrough assumes the main branch in this repository is called main.
Enable Github Pages on Github
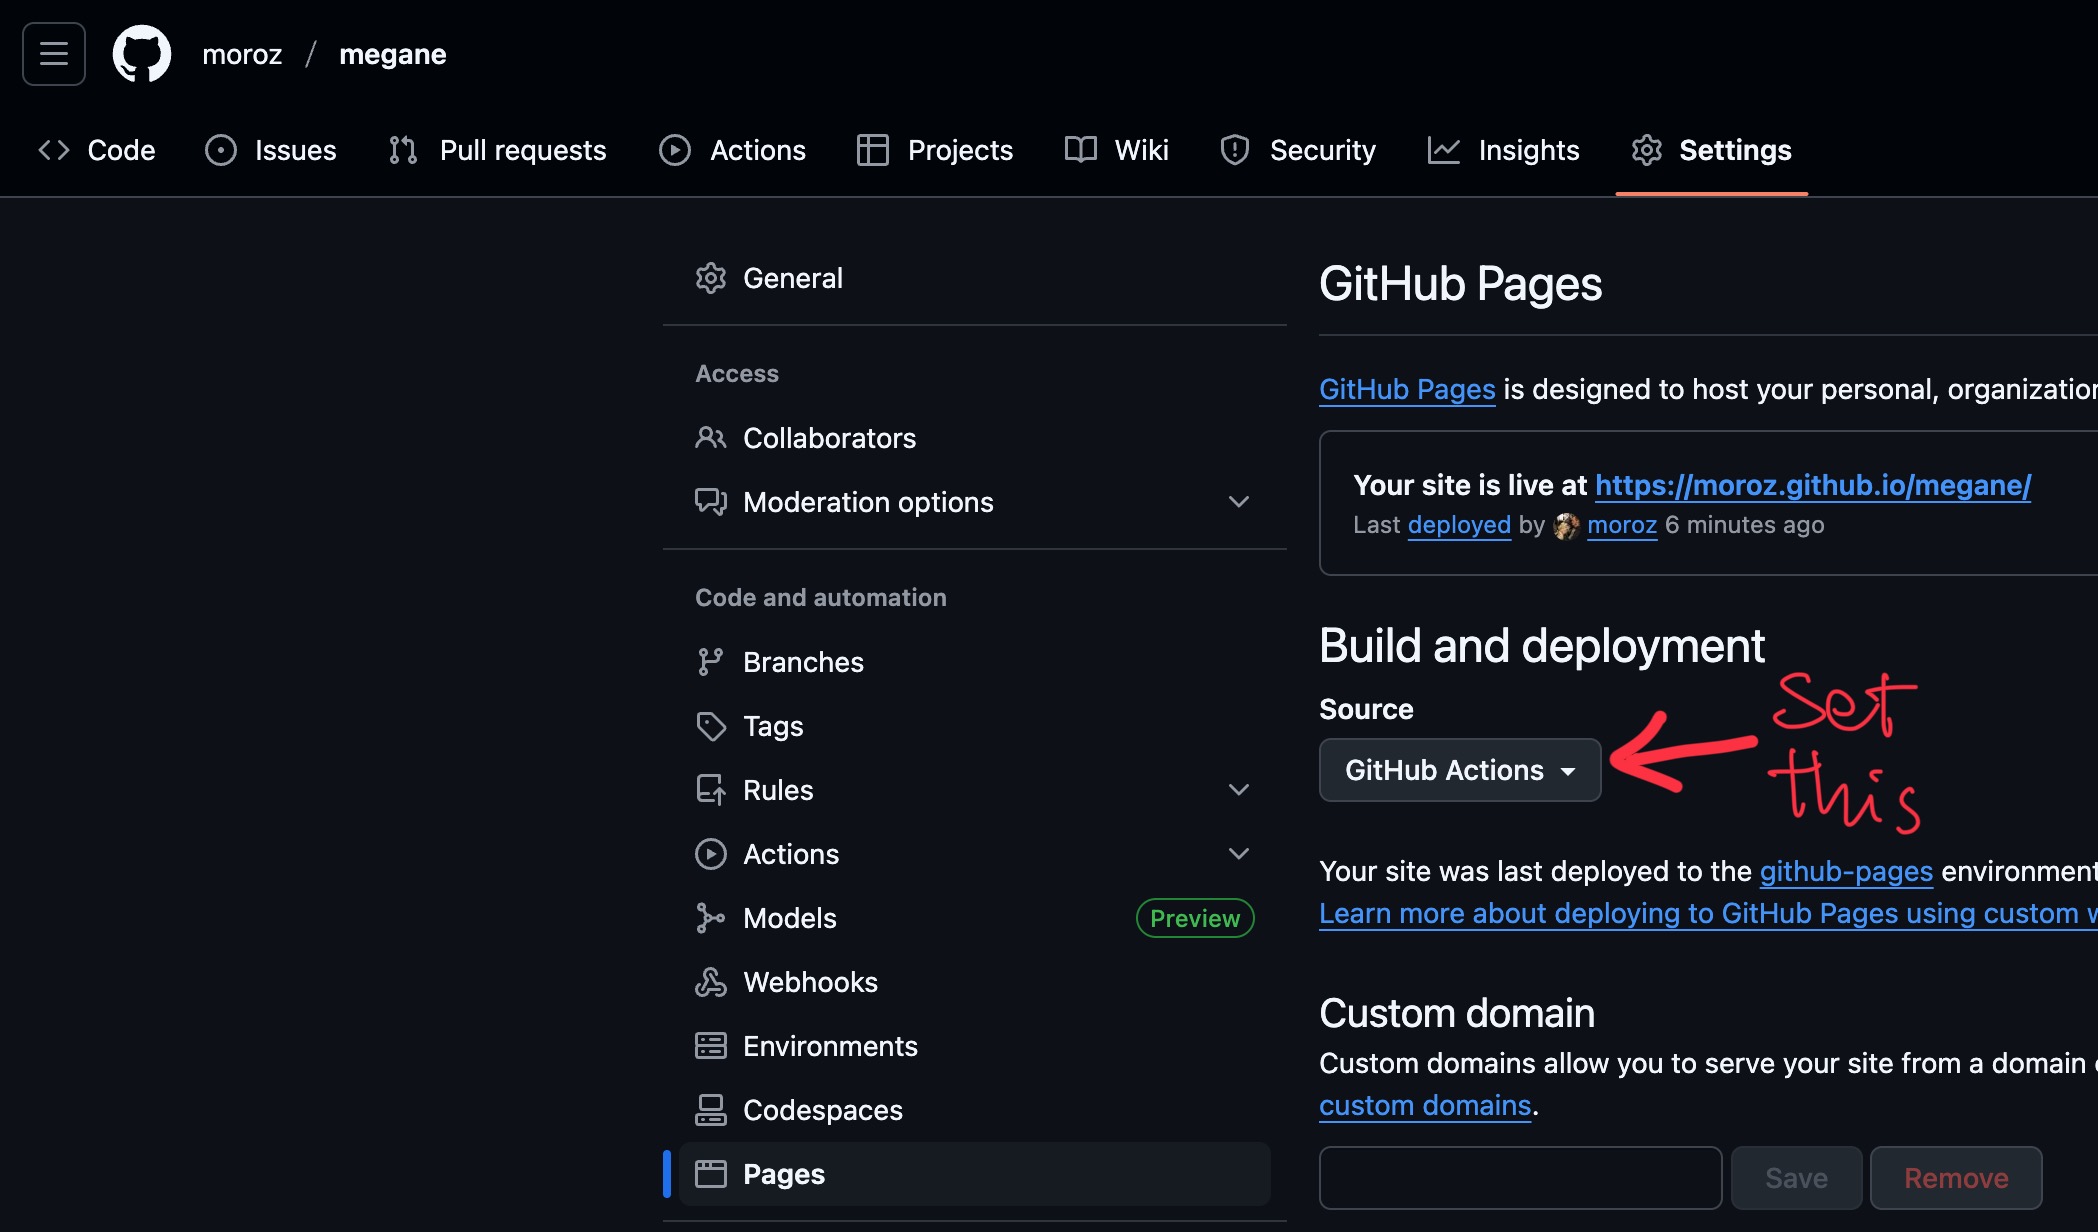
On Github, go to the Settings view of your repository. Then, in the sidebar, click Pages. You should end up at a URL looking like so:
https://github.com/moroz/megane/settings/pagesIn this view, make sure that Build and deployment -> Source is set to GitHub Actions:
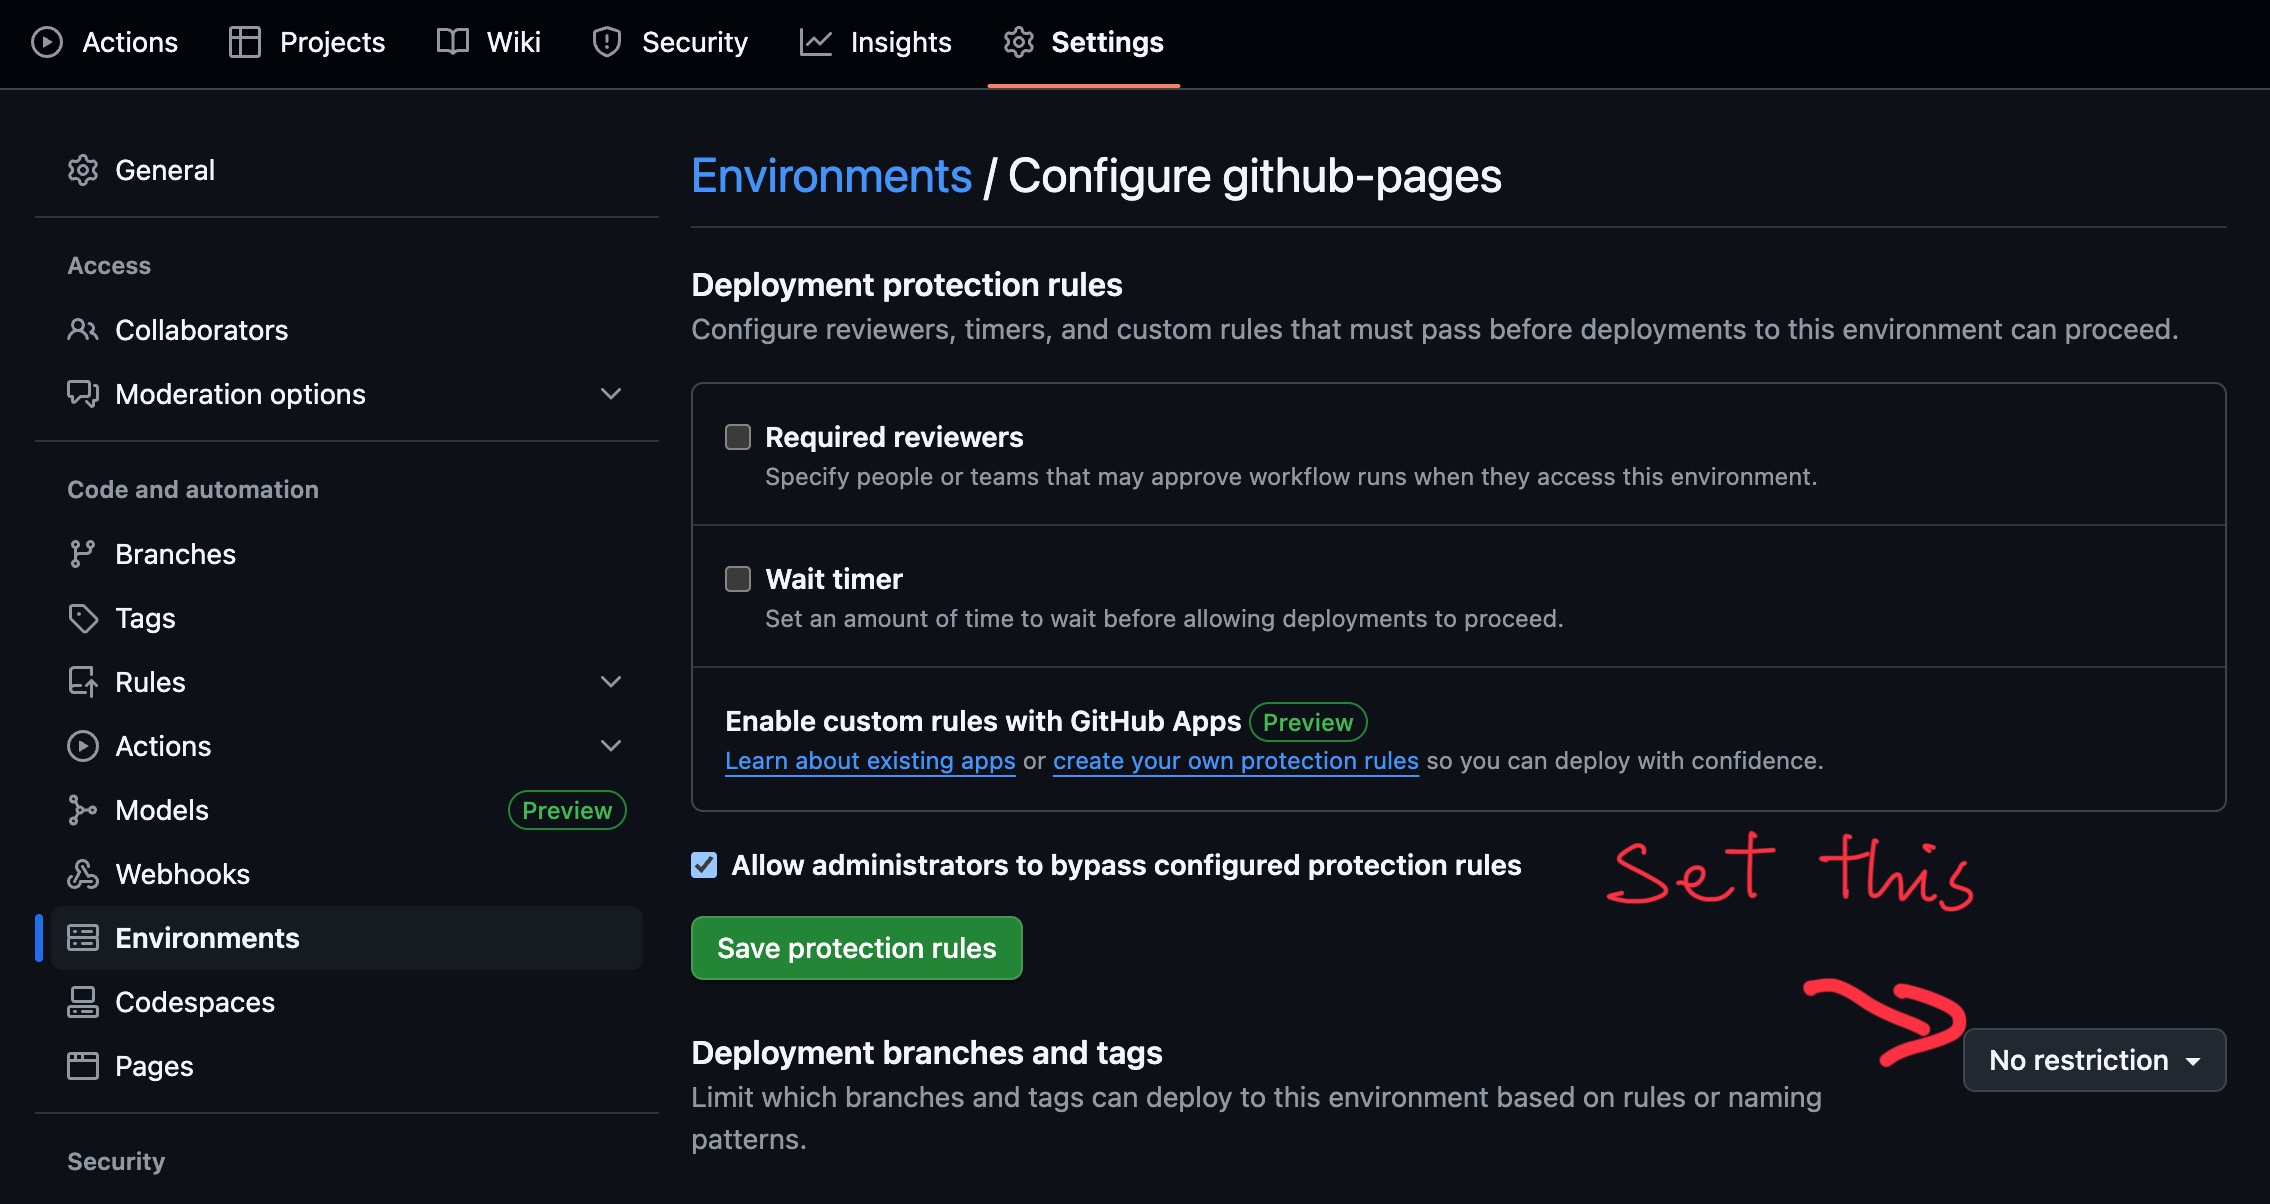
Then, go to Environments -> github-pages and ensure that Deployment branches and tags is set to No restriction:
Deploying Astro to Github pages
Next, prepare your Github username and the name of the Github repository where you’re planning to deploy your website.
In my case, my Github username is moroz and the repository will be called megane.
In the Astro configuration file, astro.config.mjs, add these settings to tell Astro about this values:
// @ts-check
import { defineConfig } from "astro/config";

const isProd = process.env.NODE_ENV === "production";

// https://astro.build/config
export default defineConfig({
  // Add these two lines; replace `moroz` with your username
  site: isProd ? "https://moroz.github.io" : undefined,
  // Replace `megane` with the name of your project
  base: isProd ? "megane" : undefined,
});
Create a directory called .github/workflows. In this directory, create a file called deploy.yml.
$ mkdir -p .github/workflows
$ touch .github/workflows/deploy.yml
In the file .github/workflows/deploy.yml, add the following configuration script. This file will instruct Github to deploy your website to Github pages every time you push to the main branch:
# https://docs.astro.build/en/guides/deploy/github/
name: Deploy to GitHub Pages

on:
  # Trigger the workflow every time you push to the `main` branch
  push:
    branches: [main]
  # Allows you to run this workflow manually from the Actions tab on GitHub.
  workflow_dispatch:

# Allow this job to clone the repo and create a page deployment
permissions:
  contents: read
  pages: write
  id-token: write

jobs:
  build:
    runs-on: ubuntu-latest
    steps:
      - name: Checkout your repository using git
        uses: actions/checkout@v4
      - name: Install, build, and upload your site
        uses: withastro/action@v3
        with:
          node-version: 24
          package-manager: pnpm@10

  deploy:
    needs: build
    runs-on: ubuntu-latest
    environment:
      name: github-pages
      url: ${{ steps.deployment.outputs.page_url }}
    steps:
      - name: Deploy to GitHub Pages
        id: deployment
        uses: actions/deploy-pages@v4
Commit and push changes.
$ git add -A
$ git commit -m "Prepare for deployment"
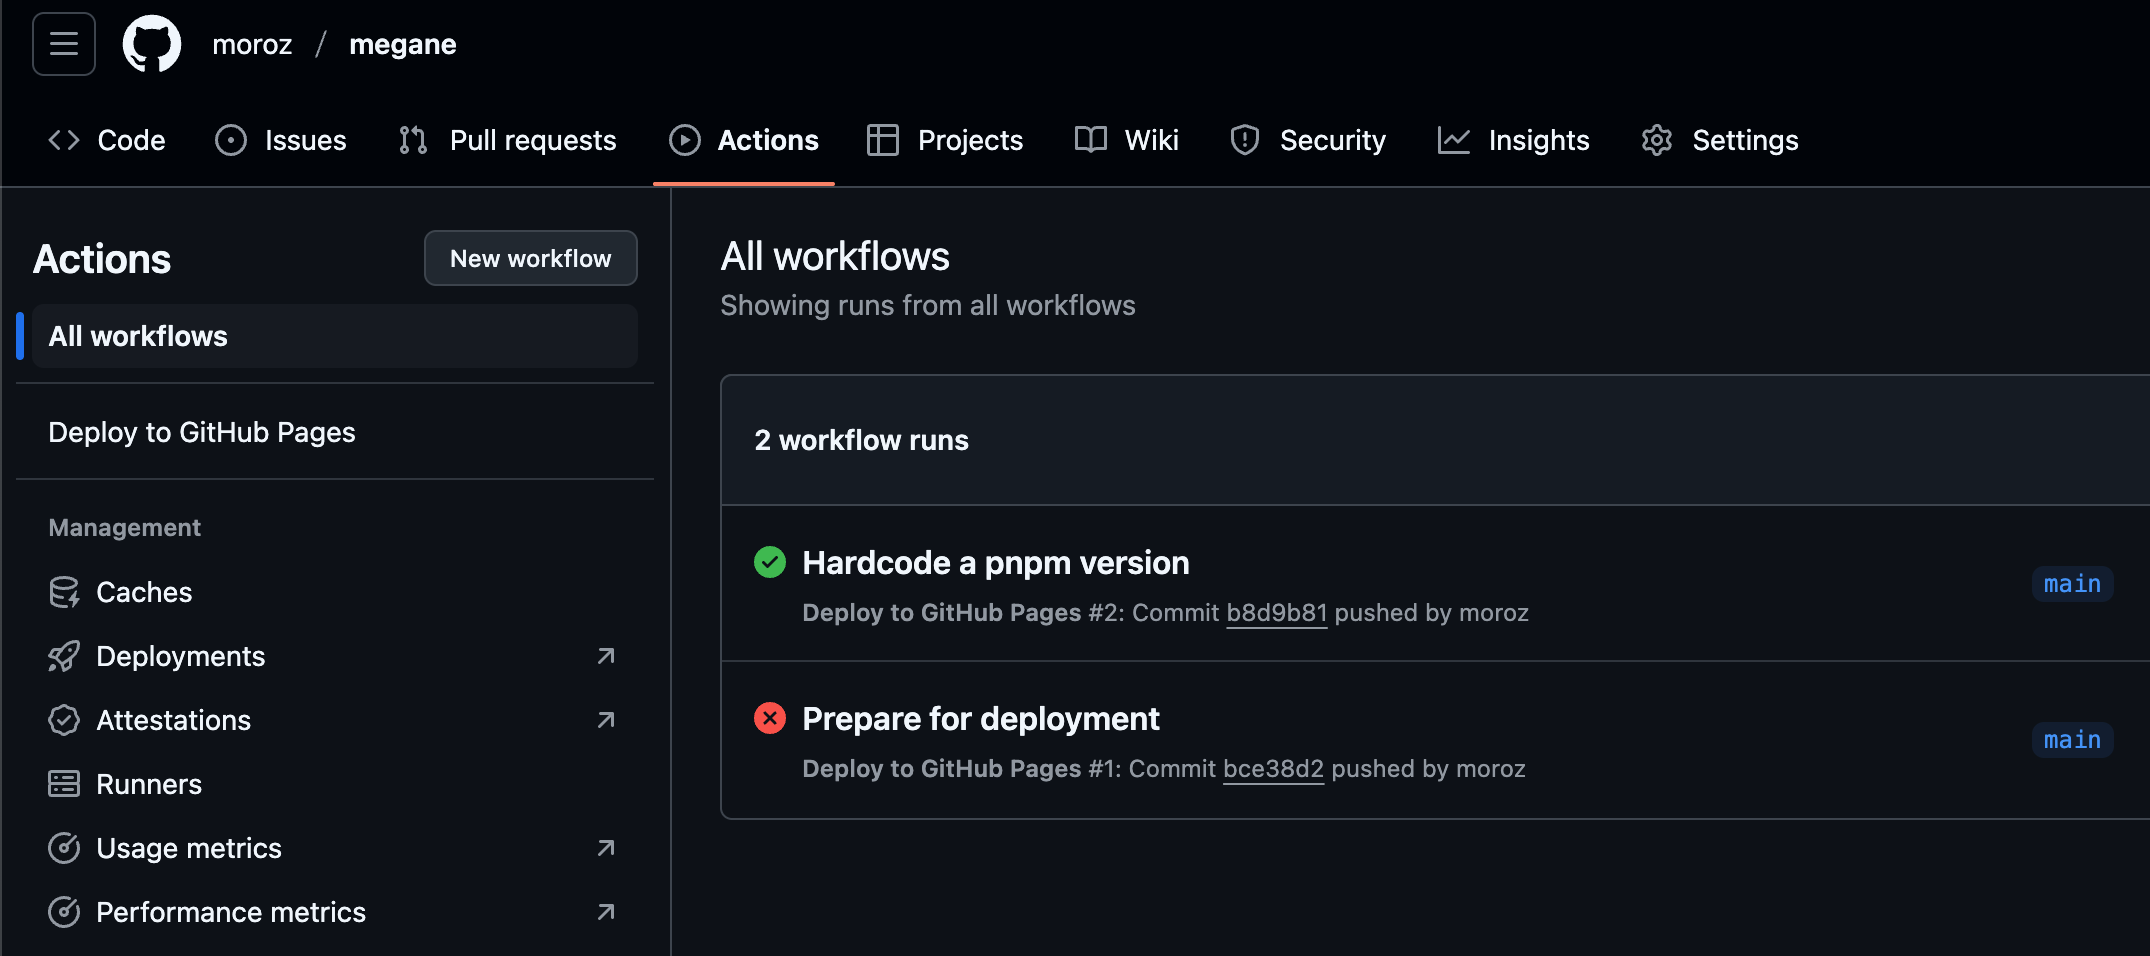
$ git push -u origin mainYou can watch the progress of your deployment in the Actions tab on Github:
Once a deployment goes through, you should be able to access your Astro website at:
https://<GITHUB USERNAME>.github.io/<REPOSITORY NAME>/For instance, in the case of my example project, the URL is as follows:
https://moroz.github.io/megane/If you found this post helpful, please consider subscribing to my YouTube channel, Make Programming Fun Again. Thank you!