Learning iOS and Swift. Day 18: Project update, more on tutorial
Karol Moroz on
Apple’s tutorial
Yesterday and today, I followed two parts of Apple’s SwiftUI tutorial: Creating and Combining Views and Building Lists and Navigation. These two parts taught me how to implement a simple, yet aesthetically very pleasing interface for a tourist guide app called Landmarks.
Below is the main screen of the application, presenting a list of landmarks in a List within a NavigationView:
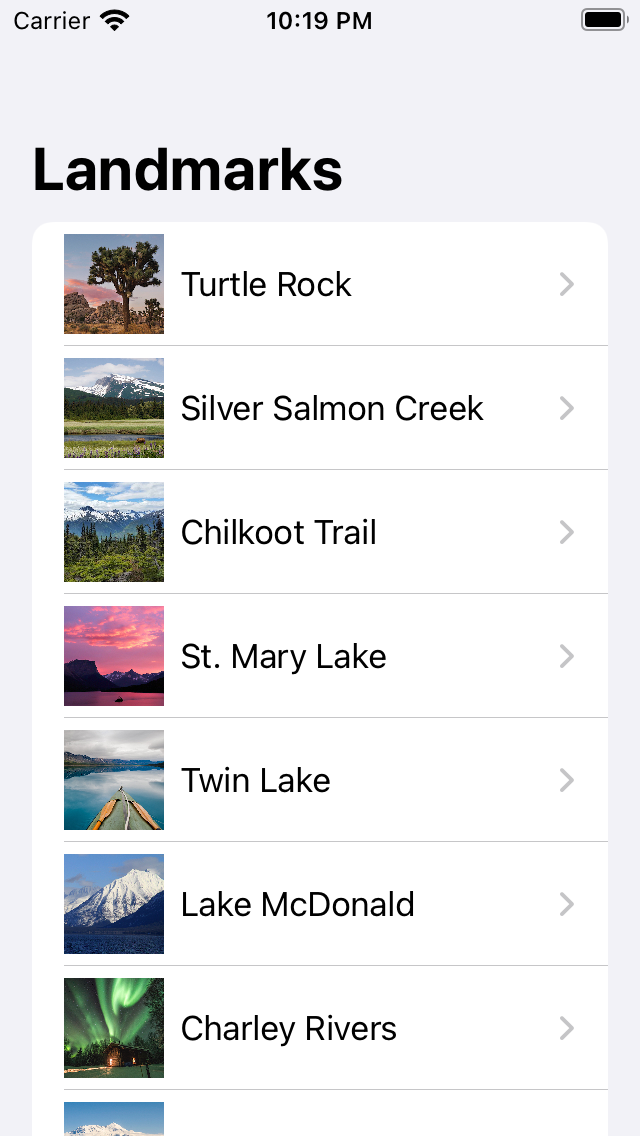
The title “Landmarks”, shown in bold font above the List, is set using the .navigationTitle(_:) modifier.
The modifier has effect only when the view is embedded in a NavigationView, otherwise it is a no-op.
struct LandmarkList: View {
var body: some View {
NavigationView {
List(landmarks) { landmark in
NavigationLink {
LandmarkDetail(landmark: landmark)
} label: {
LandmarkRow(landmark: landmark)
}
}
.navigationTitle("Landmarks")
}
}
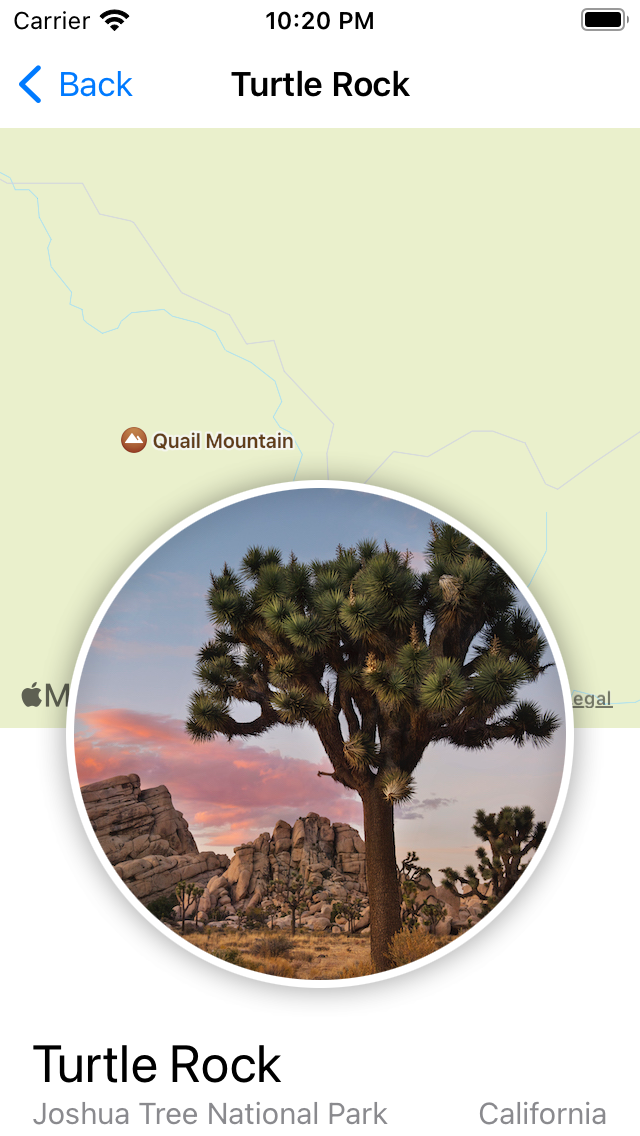
}Once the user clicks one of the NavigationLinks within the list, the user is presented with a LandmarkDetail view, presenting a map, a rounded picture, and some text:
Some important tricks that I have learned while implementing this view include more navigation modifiers:
struct LandmarkDetail: View {
  var landmark: Landmark

  var body: some View {
    ScrollView {
      MapView(coordinate: landmark.locationCoordinate)
        .ignoresSafeArea(edges: .top)
        .frame(height: 300)

      CircleImage(image: landmark.image)
        .offset(y: -130)
        .padding(.bottom, -130)

      VStack(alignment: .leading) {
        Text(landmark.name)
          .font(.title)
        HStack {
          Text(landmark.park)
          Spacer()
          Text(landmark.state)
        }
        .font(.subheadline)
        .foregroundColor(.secondary)

        Divider()

        Text("About \(landmark.name)")
          .font(.title2)
        Text(landmark.description)
      }
      .padding()
      .navigationTitle(landmark.name)
      .navigationBarTitleDisplayMode(.inline)
    }
  }
}
By setting .navigationBarTitleDisplayMode(.inline), we tell the NavigationView to present the title of the current view in the upper navigation bar, saving a lot of vertical space.
The view is embedded in a ScrollView, which allows for the view to be scrolled using touch gestures.
The pretty circular image is built like so:
struct CircleImage: View {
  var image: Image

  var body: some View {
    image
      .clipShape(
        Circle()
      )
      .overlay {
        Circle().stroke(.white, lineWidth: 4)
      }
      .shadow(radius: 7)
  }
}
The application makes heavy use of computed properties, for example to generate images from JSON-data:
struct Landmark: Hashable, Codable, Identifiable {
  /* ... */

  private var imageName: String
  var image: Image {
    Image(imageName)
  }

  /* ... */
}
Project update: Ngöndro Tracker
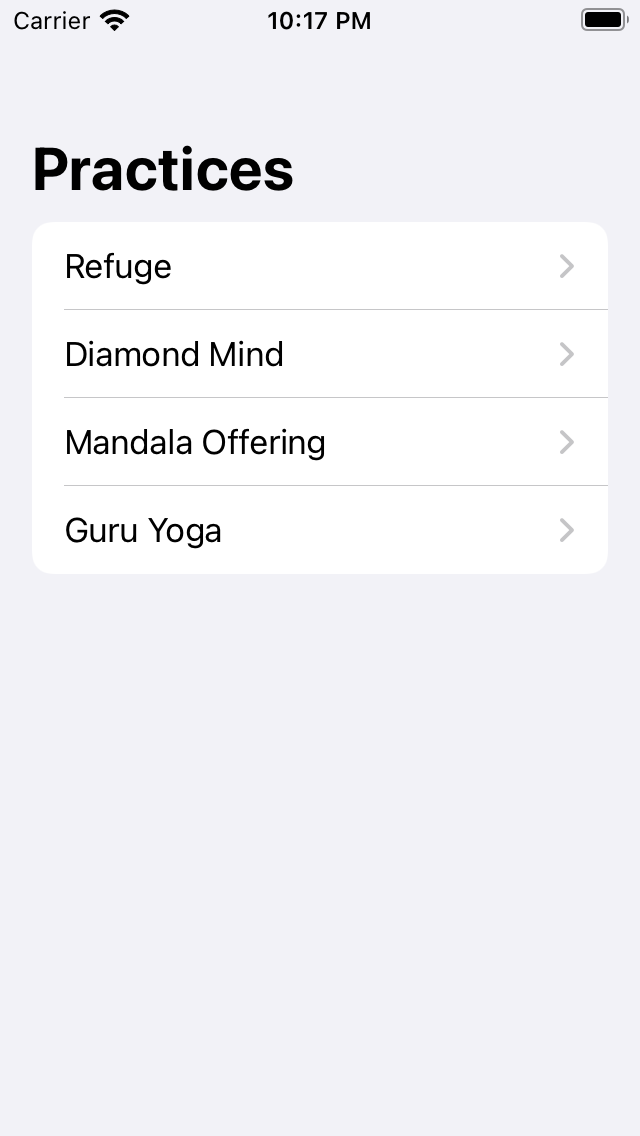
I have applied the lessons learned from the tutorial to my side project, Ngöndro Tracker. As a reminder to readers unfamiliar with Tibetan Buddhism, ngöndro (Tibetan: སྔོན་འགྲོ།, Chinese: 四不共加行) is a set of four meditation practices performed by practicioners of Tibetan Buddhism. Each of the practices contains a certain mantra or exercise that is repeated multiple times during each meditation session. In order to complete the four practices, the practitioner must accumulate 111,111 repetitions of each practice. The application I am building is intended to help keep track of the repetitons and to provide Apple Watch integration (existing solutions only work on iOS).
As of now, the application’s main view looks like this:
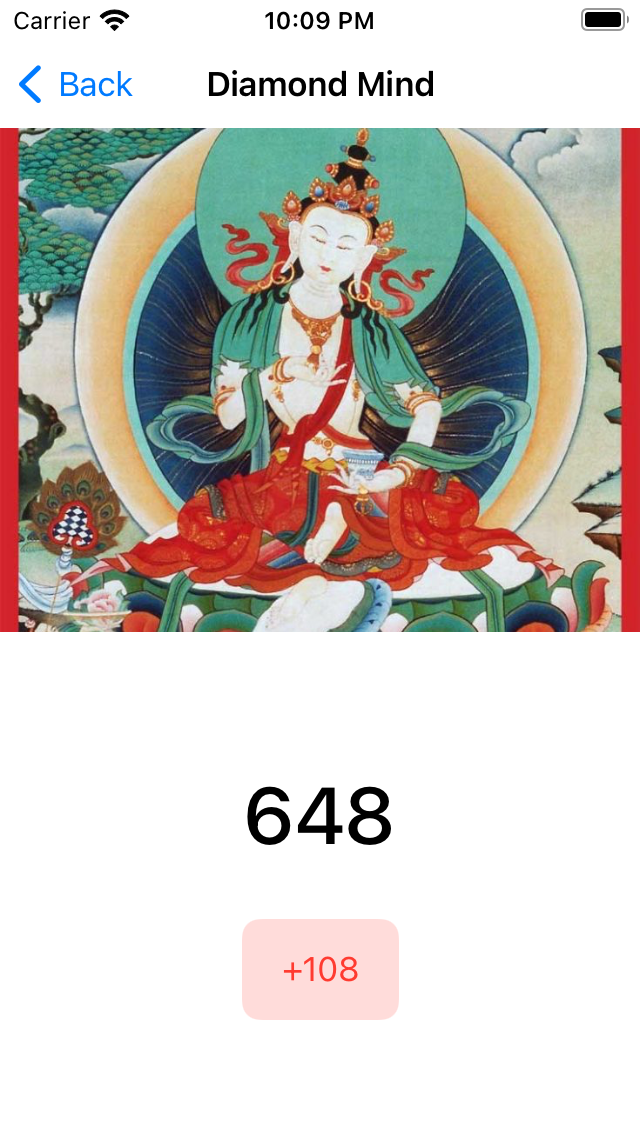
There is also a single practice view, which presents the current amount of repetitions and allows the user to add more to that count. Right now, the user can only add the default amount (108) each time. There is no way to customize the default amount, reset the starting amount, or add a custom amount on a per-practice basis.
All practice data is persisted in a SQLite database, which is accessed through SQLite.swift, without a full-featured ORM. Below is the method that persists the present amount:
func addAmount(store: DataStore, amount: Int) throws -> Int {
  guard let db = store.connection else {
    throw DatabaseError.connectionError
  }

  // SQLite supports `RETURNING current_amount`, but there is no simple way
  // to use it with the wrapper
  _ = try db.run(
    "update practices set current_amount = current_amount + ? where id = ?",
    amount, id)

  // therefore I make another query to fetch the updated amount
  let newAmount = try db.scalar(
    Practice.table.select(Practice.currentAmount).filter(Practice.id == self.id))

  return newAmount
}