How to deploy a Phoenix API on Windows Server 2019
Karol Moroz on
TL;DR: Don’t do it
Don’t deploy anything on Windows unless you really have to.
This post is meant as a last-resort reference for people compelled to only use Windows-based solutions due to the internal policies of an enterprise client. It is not a tutorial for beginners who just want to deploy their fresh Phoenix applications but have no experience with UNIX-like operating systems.
If that sounds like you, I strongly encourage you to instead use any operating system from the GNU/Linux or BSD family, such as Ubuntu Server, Debian, or FreeBSD, all available free of charge on all major cloud computing platforms.
And honestly, I’m pretty bad with Windows, myself. I’ve been using GNU/Linux (Ubuntu/Debian/Mint) or macOS as my primary OS for over 12 years now, so I literally don’t know how perform a lot of everyday tasks on a Windows machine.
Problem statement
This post aims to describe the steps necessary to deploy a Phoenix application to a Windows Server 2019 machine in a cloud-based setting, like a VM on Azure. It is possible to compile and assemble a release on your Windows 10 development machine or virtual machine and run it on Windows Server.
The application I managed to deploy was a simple JSON API server written using the excellent Phoenix Framework. In the case I was dealing with, the firewall on the production server was set to accept incoming connections and serve content, but did not allow downloading software or browsing the Web from inside of the virtual machine.
Due to the fact that Windows Server does not come with an SSH server by default, all interactions with the server had to be done through an RDP connection. This is more than enough to install Erlang and PostgreSQL, which are available as redistributable installers. However, the Elixir installer for Windows requires an internet connection, which was why I decided to compile my releases on a different machine, and deploy them on one with no Elixir installed.
The solution
The way to run a Phoenix application under these constraint is to use Elixir releases, a feature baked into the language since version 1.9. In this post, I am assuming that the release does not need to serve any static assets, and Node.js is not necessary on either machine. I am also assuming that the only database your application needs to connect to will be PostgreSQL. If you need to talk to SQL Server, which is not uncommon in Windows Server deployments, you can use the Tds driver for Ecto 3.x and the tds_encoding library to help untangle the mess of SQL Server’s Unicode “support”.
A release can be run on a different machine if the CPU architecture, OS, and ABI match (as explained in the documentation). This means that as long as we build a release on an Intel-based Windows machine with the same version of Erlang, things should work as expected on a different machine, even if they are nominally running a different version of Windows. If you manage to install Elixir on your server, you can also build your releases on your production server.
The steps below have been tested on a barebones x86_64 Windows 10 installation inside VirtualBox, serving as the build machine, and a t2.micro instance, running Windows Server 2019, serving as the production machine.
This post only covers running a release on a Windows Server instance. Actually deploying it, as in: “putting it in a supervision tree” or “developing a workflow to reliably replace old releases with new ones,” is beyond the scope of this article.
Setting up build environment
Let’s start by installing the necessary software. On your build machine (Windows 10), install Erlang from a binary package for Windows. By default, the Elixir installer uses version 21.3, but you may choose a newer release if your software depends on features only available in newer versions of OTP.
Keep the installer (otp_win64_21.3.exe), you will need to install the same version on your production machine.
Install your desired version of Elixir using the web installer. Still on your build machine, install Git using the installer. This Git distribution comes ready with a GNU-like environment and bash, which enable us to write build scripts without the hassle of non-POSIX-compliant shells or backslashes. WSL should also work if your build machine is also your development machine (again, your mileage may vary).
Unless your project is publicly accessible, you will also need a way to clone the repository onto your build machine.
One way to do it is to generate a new SSH key on the build machine using ssh-keygen and adding the public key as a read-only deploy token for the repository for your Git project (GitHub, Gitlab, AWS CodeCommit, BitBucket, etc.).
Setting up the production machine
Once we’re done setting up the build environment, we need to install at least Erlang, PostgreSQL, and Git on the production machine. PostgreSQL installers for Windows are available at EnterpriseDB. If possible, install Elixir on your production server using the web installer. You may also want to download NGINX to serve a front end application or to facilitate the process of securing your application with HTTPS.
Preparing the release
These steps are essentially the same as when preparing a release for any other platform, such as GNU/Linux, BSD, or even Docker. If you have ever deployed an Elixir release on another platform, you probably know what to do.
Set server: true
First, in config/prod.exs, tell your application’s endpoint to function as a server. The minimal required configuration is as follows:
config :myapp, MyAppWeb.Endpoint,
  http: [port: 4000],
  server: true
What this does is tell the endpoint to start listening on port 4000 using HTTP when as soon as it is started by its supervisor.
Add a release configuration in mix.exs
The mix.exs contains an exported function called project, which returns a keyword list.
At the end of that keyword list, add the key :releases with the value being a call to a new
private function called releases/0, like so:
defmodule MyApp.MixProject do
  use Mix.Project

  def project do
    [
      app: :my_app,
      version: "0.1.0",
      elixir: "~> 1.7",
      elixirc_paths: elixirc_paths(Mix.env()),
      compilers: [:phoenix, :gettext] ++ Mix.compilers(),
      start_permanent: Mix.env() == :prod,
      aliases: aliases(),
      deps: deps(),
      # Add this line:
      releases: releases()
    ]
  end

  # ...
  # omitted for brevity

  defp releases do
    [
      my_app: [
        include_executables_for: [:windows],
        applications: [
          my_app: :permanent
        ],
        steps: [:assemble, :tar]
      ]
    ]
  end
end
Thus we have defined a release configuration called my_app, with the OTP application :my_app
starting permanently. The line steps: [:assemble, :tar] tells Mix to actually assemble a release
and create a convenient .tar.gz archive (tarball) that we can conveniently paste to the production
machine over RDP.
Add a shell script to build your release
By default, Windows does not provide a POSIX-compliant shell. However, we can still execute shell scripts
inside the GNU-like MINGW environment bundled with Git.
Below is a simple script that will pull changes from the upstream repository, install Elixir dependencies,
compile the application and assemble a release. Put these lines inside scripts/build-release.sh:
#!/bin/sh

set -e

export MIX_ENV=prod
RELEASE_NAME=myapp

# OPTIONAL (and potentially desctructive):
# This will discard all changes you may have made in your working directory.
# Skip these lines if you are building on your development machine.
# echo "Discarding changes in the working tree..."
# git clean -fd
# git checkout -- .

echo "Pulling..."
git pull

echo "Installing hex and rebar..."
mix local.hex --force
mix local.rebar --force

echo "Installing Elixir dependencies..."
mix deps.get --only prod

echo "Compiling application..."
mix compile

echo "Assembling release..."
mix release $RELEASE_NAME --overwrite
Normally, you should set the executable flag on the script with chmod +x scripts/build-release.sh, but on Windows, it doesn’t
really make a difference, because NTFS doesn’t make this distinction anyway.
By default, a Phoenix application comes with a config/prod.secret.exs file. You may want to delete this file and the code that
imports its settings from inside config/prod.exs.
Runtime configuration and secrets
Create an empty file at config/runtime.exs. When building a release, Mix will recognize the file and enable the release to use
a release.exs file for start-up configuration. This may require you to have Elixir installed on your deployment machine.
Automatically run migrations
You can add a simple Task to run Ecto migrations on startup:
Migrator:
defmodule MyApp.Migrator do
  @moduledoc """
  Run Ecto migrations upon application startup.
  Used to automatically trigger database migrations in a CD setup.
  """

  @otp_app :myapp
  @repo MyApp.Repo

  require Logger

  use Task, restart: :transient

  def start_link(arg), do: Task.start_link(__MODULE__, :run, [arg])

  def run(_) do
    Logger.info("#{inspect(__MODULE__)} is running database migrations")
    migrations_dir = :code.priv_dir(@otp_app) |> Path.join("repo/migrations")
    Ecto.Migrator.run(@repo, migrations_dir, :up, all: true)
    Logger.info("#{inspect(__MODULE__)} has finished running migrations")
  end
end
Then, add it to the supervision tree in your application module:
defmodule MyApp.Application do
  # See https://hexdocs.pm/elixir/Application.html
  # for more information on OTP Applications
  @moduledoc false

  use Application

  # Add this line
  @tasks if Mix.env() == :prod, do: [MyApp.Migrator], else: []

  def start(_type, _args) do
    children =
      [
        # Start the Ecto repository
        MyApp.Repo,
        # Start the Telemetry supervisor
        MyAppWeb.Telemetry,
        # Start the PubSub system
        {Phoenix.PubSub, name: MyApp.PubSub},
        # Start the Endpoint (http/https)
        MyAppWeb.Endpoint
        # Start a worker by calling: MyApp.Worker.start_link(arg)
        # {MyApp.Worker, arg}
      # and this
      ] ++ @tasks

    # See https://hexdocs.pm/elixir/Supervisor.html
    # for other strategies and supported options
    opts = [strategy: :one_for_one, name: MyApp.Supervisor]
    Supervisor.start_link(children, opts)
  end

  # Tell Phoenix to update the endpoint configuration
  # whenever the application is updated.
  def config_change(changed, _new, removed) do
    MyAppWeb.Endpoint.config_change(changed, removed)
    :ok
  end
end
Actually building the release
When your application is all set up, you can build a release using the bash script we added before:
scripts/build-release.shIf everything succeeds, you will get a .tar.gz file inside _build/prod/rel/my_app. This file contains
your whole application compiled with dependencies. You can now copy it to your production machine over RDP.
In Windows Explorer, the package will not be recognized, but Git bash comes with tar and gunzip, so
you can unpack the file just fine using tar xzf. The -C flag may come in handy to pick a target directory.
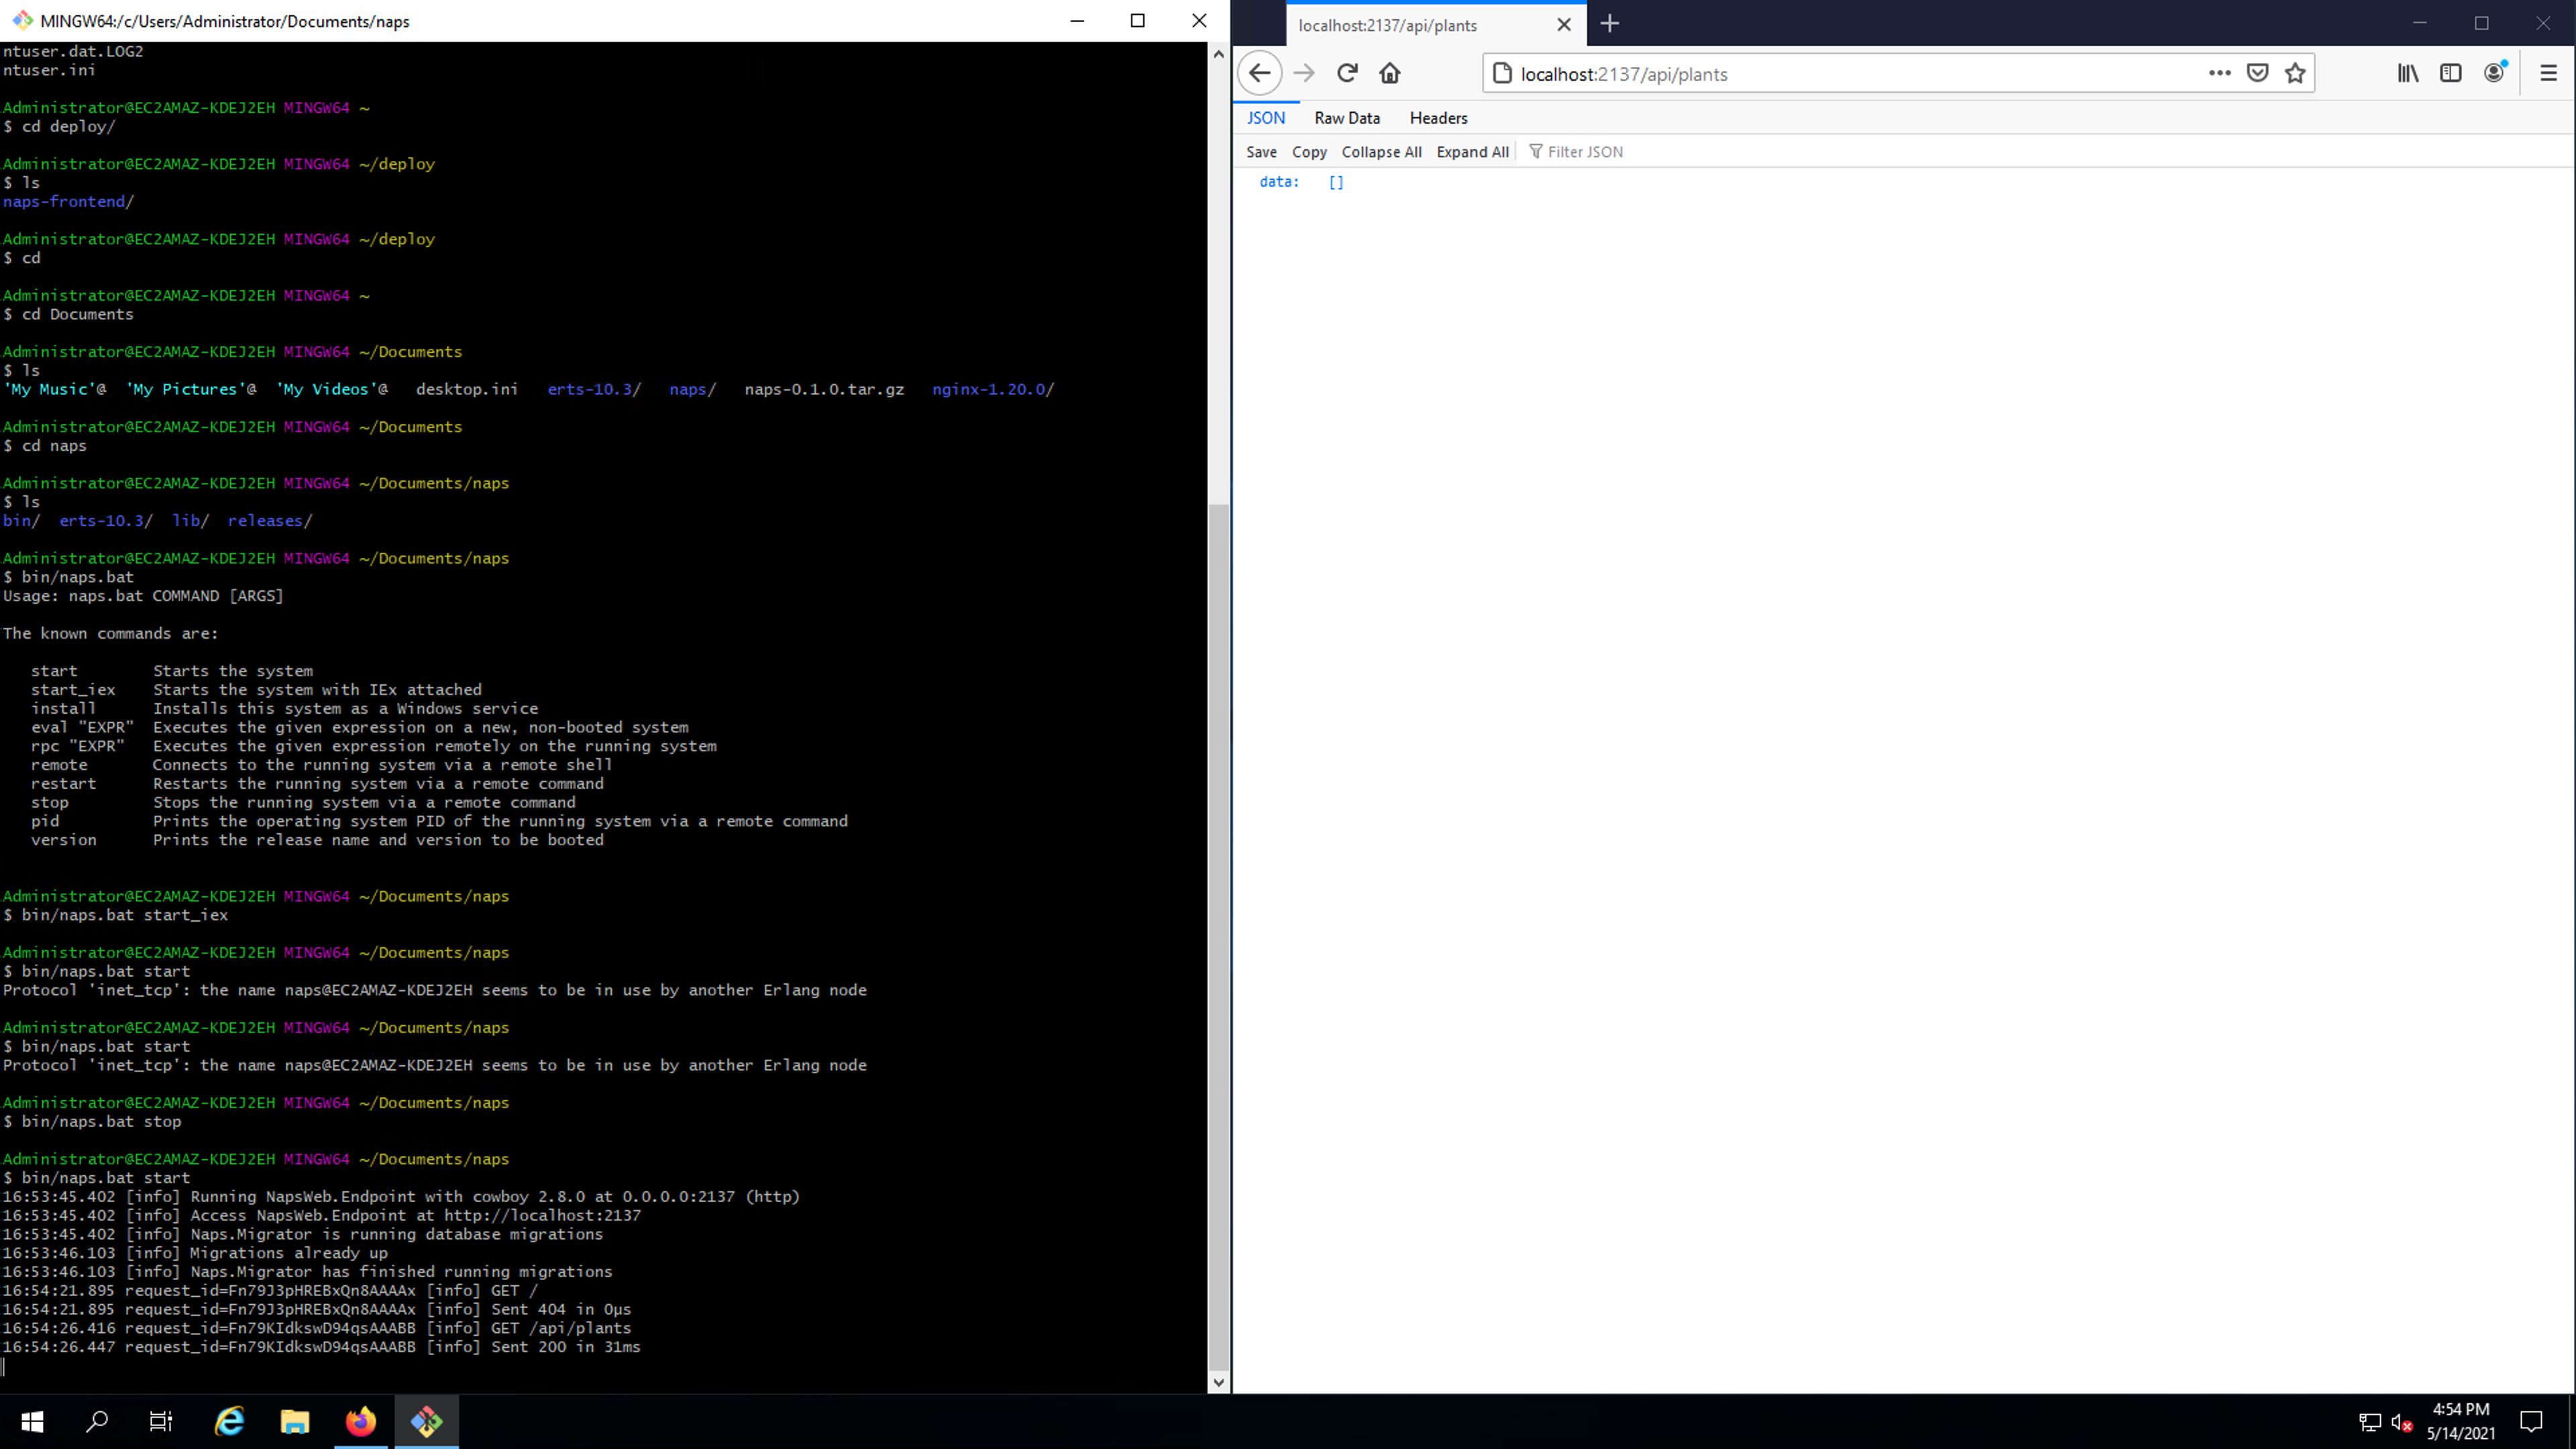
Once the release is unpacked, you can run it using the batch script packaged inside the bin/ directory of the release
archive. Below is a screenshot of a release running and receiving connections:
{/* !—
8. Clone the repository onto the build machine.
9. cd naps
10. scripts/build-release.sh. This script will discard all changes to your working tree. Make sure your tree is clean.
11. You will find the release package under _build/prod/rel/
12. You can unpack the package using tar xzf inside git bash.
13. The windows executable for the release lives inside bin/naps.bat.
14. Database migrations run automatically every time you start the release.
—*/}